The making of a cane
Some of my collections are created using a process called caning.
It is characterised by intricate patterns and is one of my favourites.
I've been working on, and improving, this technique for the past number of years.
It's exciting and a little bit daunting and here is a little peak into what it entails:
It all starts with some inspiration, probably from nature.
Then a rough design drawing...

...followed by blending the exact shades of clay to match the design.

The clay I use arrives in primary colours which I then knead and fold together to create the desired tones.

Then comes the most intricate part where the different colours of clay are combined to form
individual floral components in a three dimensional rod shape.

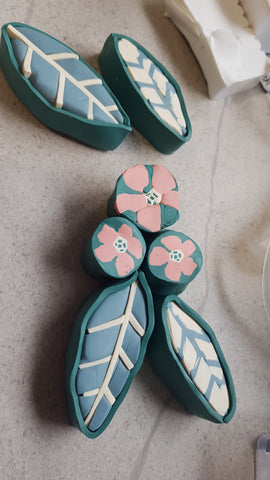
These simple designs are all cut to a similar length and...

...placed next to each other to recreate the floral pattern from the original design drawing. (More or less)

The clay is then compressed very slowly, by hand, to form the 'cane'.
I continue pressing and turning the cane so that it gets even pressure and doesn't distort the image inside. This part of the process is extremely physical when working with large blocks of clay.

The aim is to make the cane longer, reducing the size of the image, without distorting the image inside.
While reducing the cane, ends of the canes inevitably become distorted, but fear not,
they are never discarded.
I cut the ends off and turn them into small trinket bowls.
Any remaining clay is kept and used for mixing future colour combinations.
So NO waste :)

When the cane reaches the desired size, I cut thin, even slices from the cane and
use these to make the lovely jewellery pieces you see all over my website.

The clay pebbles are then fired at a low temperature to cure it.
Finally, the little clay pieces are sanded, carefully drilled and assembled with
hypoallergenic fittings, resulting in something truly unique.
It is slow, intensive, and sometimes body-breaking work but I love every single step along the way.
So, next time you hold my work in your hands, I want you to
think of the joy I experienced in the making of it.
If you'd like to see more behind the scenes content,
you'll find plenty on instagram and facebook @MarleseMade
Thank you for supporting me in this journey.
I'm really pleased that at the end of it all, you get to have nice things too!
Click here to find YOUR wearable piece of art